Welcome to our ad-free, family-friendly, and privacy-centric site!
Free Pumpkin Carving Patterns, Templates, Halloween Coloring Pages, and Word Search Puzzles!
Thank you so much for spending part of your day visiting PumpkinLady.com! Every single one of our pumpkin carving templates are lovingly-created, original designs by Lisa B., The Pumpkin Lady. Over the past 23 years, we have put together a wonderful collection of close to 1,000 free pumpkin carving stencils. It’s our hope that you will find the perfect Halloween design to help you create a pumpkin carving masterpiece!
Our site generates a lot of traffic during the Fall season, so for the past few years we jumped on the advertising bandwagon…and truthfully, ads generated a nice little side income. We used the ad revenue to pay for the website’s overhead and to help take care of our rescue kitties (we love our little ones). However, we became increasingly uncomfortable with the way companies track people as they browse the Internet, and became even more frustrated with being inundated with ads.
We just couldn’t, in all good conscience, continue to be a part of that environment. We love Halloween, and we want families to have fun while browsing through our pumpkin carving patterns…and not deal with the aggravation of of scrolling, clicking, and dodging ads at every turn. So…we switched gears and wiped out ads altogether.
Our site, because of the traffic we see every Halloween, costs quite a bit each year…lol…and don’t even get us started on how much our rescue kitties cost! We knew that stopping the ad revenue completely would hit us pretty hard…but we feel that this was the right decision to make for us and our fellow carvers. That being said, we’re hoping that you enjoy the direction we are taking with the site and humbly ask you to consider “Buying us a coffee.”
There is a coffee cup icon at the bottom right corner of the the browser where you can buy us a coffee without leaving the site. There are also buttons that will take you to our site on buymeacoffee.com where can make a contribution. Buymeacoffee.com is a wonderful service for creators…they handle everything and you don’t even have to create an account with them!
1% of all contributions go to combatting climate change and the rest will be used to keep this site running ad-free and to help take care of our little meows! We will be forever grateful for any contribution.
Click here to meet the “Littles”…our rescue kitties 🙂
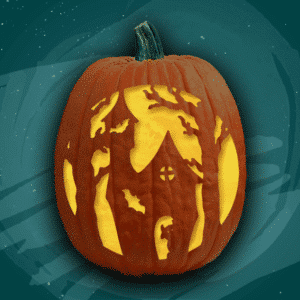
Our Free Pumpkin Carving Patterns
We have TONS of Free Pumpkin Carving Templates to browse through! You can browse then all or simply click on a category button. If you want to return to the top of the page, click the “up” arrow at the bottom right. Happy Carving!
-
All Patterns865 Products
-
Americana17 Products
-
Cats and Witches95 Products
-
Classic Jacks225 Products
-
Fairy Tales32 Products
-

Faith18 Products
-
Famous Faces27 Products
-
Ghosts37 Products
-
Hallowords66 Products
-
Harvest Home36 Products
-
Magick Symbols33 Products
-
Nature108 Products
-

Puppers14 Products
-
Screatures111 Products
-
Skulls25 Products
-
Special Occasions12 Products
-
Winter Wonderland11 Products